# Instructions to install/load into a database application

## Pre-Requisites to using the Linked ID data <a href="#bookmark4" id="bookmark4"></a>

It is highly recommended that the Linked ID data be loaded into a database application for use. It is not possible to illustrate within this guide the loading of these datasets into every database application available. Therefore, users should familiarise themselves with the operations of both loading the data and then indexing it so that performance can be improved.

For the purposes of this guide, an example will be shown illustrating the loading of the Road\_TOID\_Street\_USRN Linked ID CSV file into a PostgreSQL (Open Source) database.

### Preparation <a href="#bookmark6" id="bookmark6"></a>

In this example version 11 of PostgreSQL is being used. It is expected that a later release (version 12) should also behave in a similar manner. Pg\_Admin 4 or any other free database manager can be used to carry out the procedures. Pg\_Admin 4 is the database manager front-end application installed with PostgreSQL, and PostGIS for tables with geometry, will be used to illustrate the procedures.

## Create Schema <a href="#bookmark7" id="bookmark7"></a>

It is assumed that the end user has already created a database within Postgres to hold other data. The other data held by the user will be held in different schemas. It is recommended that a new schema be created to hold the Linked ID data, especially if the user intends to use most or all the Linked IDs available.

1. In Pg\_Admin right-click on Schemas under the database listing<br>

   <figure><img src="/files/7et4hmF0AfDOechVC9P1" alt="Schemas listed under the database listing in the left hand side menu" width="563"><figcaption><p>Schemas listed under the database listing in the left hand side menu</p></figcaption></figure>
2. Select ‘Create Schema’.<br>

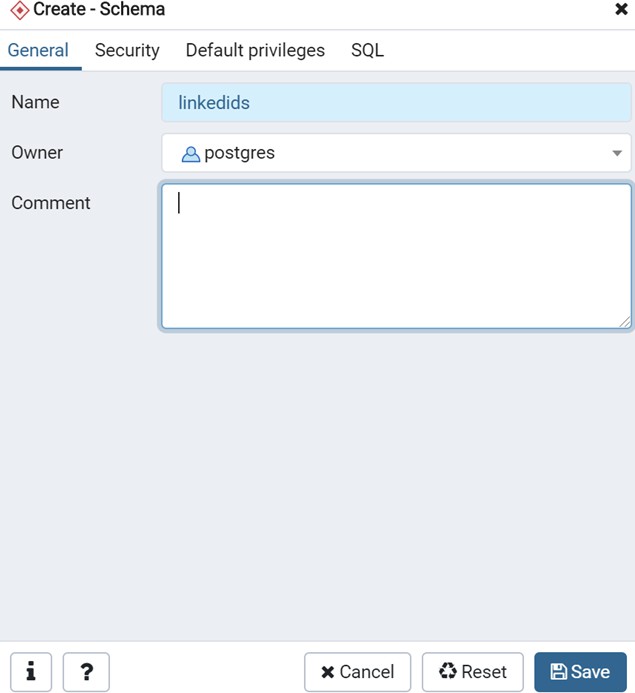
   <figure><img src="/files/VlDJ6rrz9SFPdz0nA2xR" alt="Create schema window showing schema name and owner" width="476"><figcaption><p>Create schema window showing schema name and owner</p></figcaption></figure>
3. Give the schema a name in the Name box.
4. Click ‘Save’

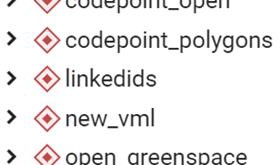
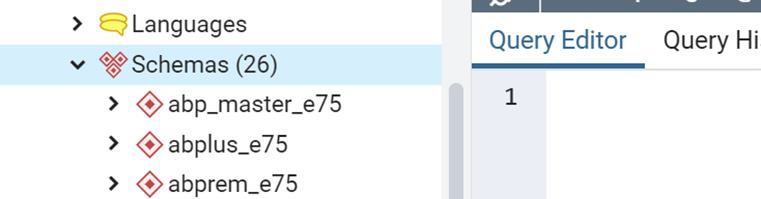
The new schema now appears in the listing of schemas within the database.

<figure><img src="/files/FrqDHwl5IPs1wn52BES8" alt="New schema shown in the database explorer menu"><figcaption><p>New schema shown in the database explorer menu</p></figcaption></figure>

## Create Table <a href="#bookmark8" id="bookmark8"></a>

The next procedure will show you how to create a table within the schema to hold the Linked ID data for the individual Linked ID that the user is seeking to load. The table will need to have columns created corresponding to the fields within the Liked ID .CSV file. The user will either need to use an advanced text editor (e.g. UltraEdit) to view the CSV data, or refer to the technical specification document to see what fields are contained within the Linked ID data, and the what are the data types within the fields. In this example, we will define all the fields within the Linked ID data as text fields.

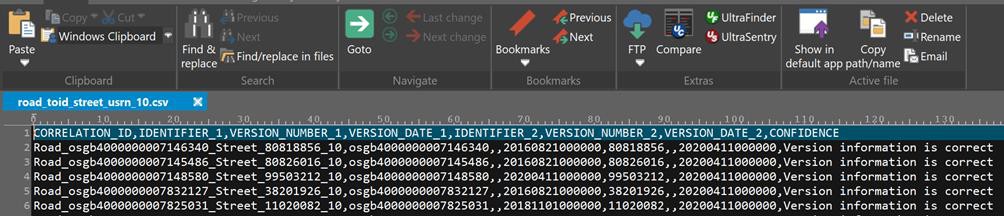
1. Using UltraEdit Text editor, which can open very large CSV files, we can view the column headings within the CSV file. The example below shows the opening of the Road\_Toid\_street\_USRN\_10.CSV file, which is the example Linked ID file we will be using to illustrate the loading procedure in this guide.<br>

   <figure><img src="/files/O6m3YXxWjoGODtRSOxB0" alt="CSV file showing column headings displayed in the text editor" width="563"><figcaption><p>CSV file showing column headings displayed in the text editor</p></figcaption></figure>
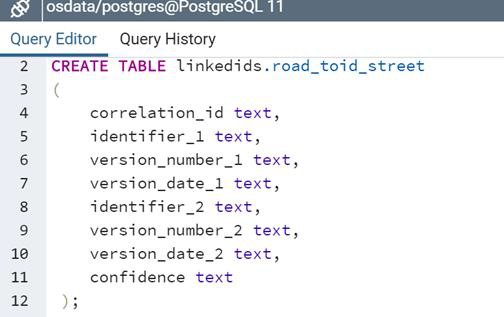
2. We have identified the column headers and can now use a script like the one below which will carry out the table creation operation. This includes both dropping any pre-existing table of the same name, and then creating a table to hold the data.

Please note this code will need to be modified to account for the variables in the user's own environment, but the column names and data types will remain the same.

```sql
DROP TABLE IF EXISTS linkedids.road_toid_street;
CREATE TABLE linkedids.road_toid_street (
correlation_id text, 
identifier_1 text, 
version_number_1 text, 
version_date_1 text, 
identifier_2 text, 
version_number_2 text, 
version_date_2 text, 
confidence text
);
```

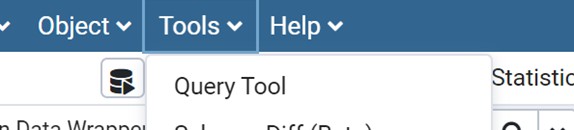
3. In Pg\_Admin, under ‘Tools’, select ‘Query Tool’ to open a SQL query window

<figure><img src="/files/T5DAONivDfTzrRSD7ITj" alt="Query tool selection in the Tools menu for opening a new SQL query window" width="431"><figcaption><p>Query tool selection in the Tools menu for opening a new SQL query window</p></figcaption></figure>

4. Copy and paste the code from a Text file (recommended) into the SQL window.

<figure><img src="/files/oaku8SI4uIECJ2IYpKLq" alt="Create table SQL code shown pasted into the SQL window" width="378"><figcaption><p>Create table SQL code shown pasted into the SQL window</p></figcaption></figure>

5. When satisfied, click the ‘run’ button to execute the query.

<figure><img src="/files/v5F1aP3MDZRwS7Xi2R6C" alt="Run button shown in the toolbar" width="128"><figcaption><p>Run button shown in the toolbar</p></figcaption></figure>

The query should now run, creating the table, and loading the data into the created table. A success message should appear when the query has run.

## Loading the data <a href="#bookmark9" id="bookmark9"></a>

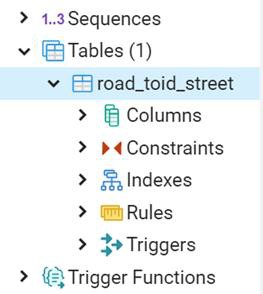
In Pg\_Admin, under the LinkedIDs schema a new table should now be visible.

<figure><img src="/files/Wqo0Soyu1wMJQfV10oKZ" alt="road_toid_street table now visible under the tables heading"><figcaption><p>road_toid_street table now visible under the tables heading</p></figcaption></figure>

In this example the new table is called road\_toid\_street. We will now use the import data function within Pg\_Admin\_4 to load the data into the created table.

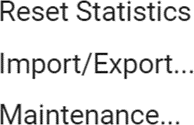
1. Right-Click on the road\_toid\_street table just created and select ‘import/export’.

<figure><img src="/files/BQqbV6cf5v2bmzRYrcLC" alt="Import/export menu option shown"><figcaption><p>Import/export menu option shown</p></figcaption></figure>

<figure><img src="/files/ztGnE39dx03wHErVSB0W" alt="Import/export data window" width="511"><figcaption><p>Import/export data window</p></figcaption></figure>

2. In the window that appears, select the import/export to 'import'.
3. Select the filename of the CSV file which is being imported.
4. Set the encoding to UTF-8.
5. Set the header box to ‘Yes’ because we know that the CSV file contains header information.
6. Select the delimiter to comma.
7. Click ‘OK when finished. The data will now load into the created table.

## Viewing/Indexing the data <a href="#bookmark10" id="bookmark10"></a>

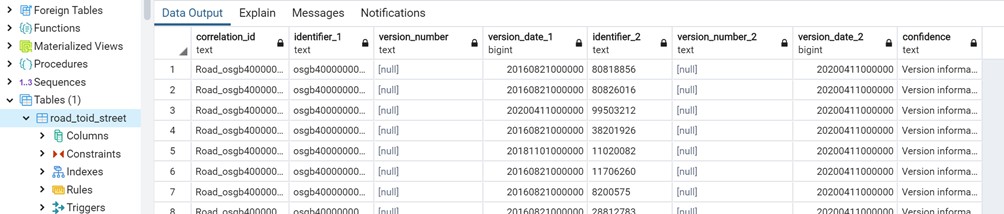
1. Right-clicking on the road\_toid\_street table and viewing the top 100 rows shows a result similar to that shown below. This indicates that the Linked ID data for the Road\_Toid\_street\_USRN\_10.CSV has been successfully loaded into the database.

<figure><img src="/files/ccB2oyFGfFCrXSsztFaZ" alt="Data output shown for road_toid_street table"><figcaption><p>Data output shown for road_toid_street table</p></figcaption></figure>

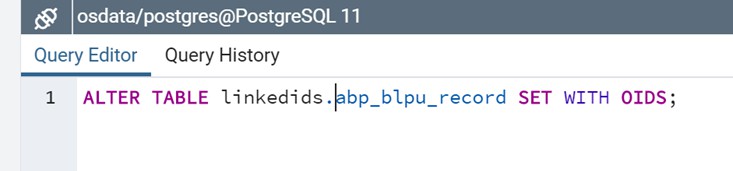
2. The data should now be indexed, which can be done by adding an index to one of the fields in the data or by adding OIDs as unique IDs to the data. This can be achieved by typing in a code string like the one shown below into the query window and then running the query.

<figure><img src="/files/se3VdFJUFD7pahTkYzl2" alt="Alter table query table shown in the query editor window of PostgreSQL 11" width="550"><figcaption><p>Alter table query table shown in the query editor window of PostgreSQL 11</p></figcaption></figure>

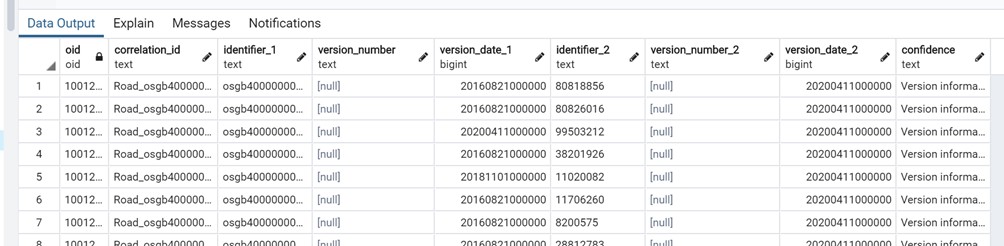
Adding this new field will enable any joining and querying to be achieved much more quickly. Looking at the data table now, we can see that PostgreSQL has added a unique OID field to the data.

<figure><img src="/files/5lABrqwvcEsOV0GIm8Uz" alt="Updated table after query has been run"><figcaption><p>Updated table after query has been run</p></figcaption></figure>

Other database applications will have similar methods for the creation and loading of data tables. The data is now ready for use and table-joins can now be made with the end user's own data held either within a database or outside the database in a GI application


---

# Agent Instructions: Querying This Documentation

If you need additional information that is not directly available in this page, you can query the documentation dynamically by asking a question.

Perform an HTTP GET request on the current page URL with the `ask` query parameter:

```
GET https://docs.os.uk/os-downloads/products/buildings-and-infrastructure-portfolio/os-open-linked-identifiers/os-open-linked-identifiers-getting-started-guide/instructions-to-install-load-into-a-database-application.md?ask=<question>
```

The question should be specific, self-contained, and written in natural language.
The response will contain a direct answer to the question and relevant excerpts and sources from the documentation.

Use this mechanism when the answer is not explicitly present in the current page, you need clarification or additional context, or you want to retrieve related documentation sections.