# MapInfo Professional

These instructions are based on MapInfo Professional 2019 and assume you have set the default coordinate reference system to British National Grid (EPSG 27700).

{% hint style="info" %}
*While MapInfo Professional can open GML files without prior translation, for performance and compatibility reasons, we recommended you use the Universal Translator built into MapInfo Professional versions 12.5 onwards to convert the GML supply to MapInfo TAB files prior to loading the data.*
{% endhint %}

The sections below provide instructions for both working with GML data and converting to MapInfo TAB.

## Loading and displaying the GML supply <a href="#id-6.1-loading-and-displaying-the-gml-suppl" id="id-6.1-loading-and-displaying-the-gml-suppl"></a>

To load and display the GML supply directly in MapInfo Professional:

1. Open an existing workspace or create a new one.
2. From the Home tab, click *Open* > *Universal Data*.

<figure><img src="/files/USgcbau4RJeoXGwvbdmz" alt="MapInfo Professional UI showing Home > Open > Universal Data action" width="446"><figcaption><p>MapInfo Professional UI showing <em>Home > Open > Universal Data</em> action</p></figcaption></figure>

3. In the Specify Data Source dialog:
   * Format: Select *GML (Geography Markup Language)*.
   * Dataset: Click …, and navigate to and select the GML file (.gz) in the file browser.
   * Click *OK*.

<figure><img src="/files/DKFCHTUcYc3WmcTvKtfI" alt="MapInfo Professional Specify Data Source dialog" width="320"><figcaption><p>MapInfo Professional Specify Data Source dialog</p></figcaption></figure>

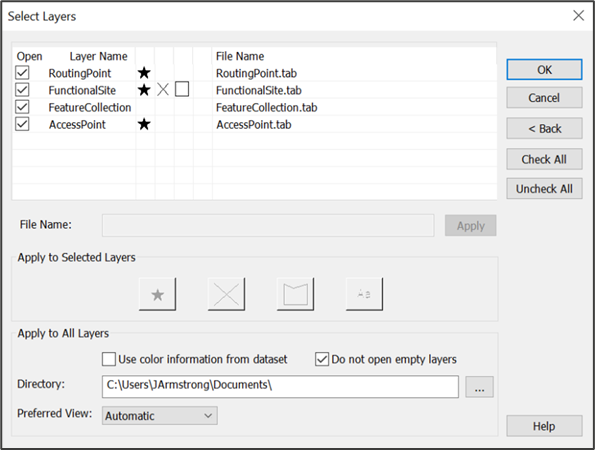
4. In the Select Layers dialog, select the layers you want to load and click *OK*.

<figure><img src="/files/2lJk4KdeGNH2VXkt5wrs" alt="MapInfo Professional Set Layers dialog" width="446"><figcaption><p>MapInfo Professional Set Layers dialog</p></figcaption></figure>

Your GML data will now display in the Maps panel and map area.

{% hint style="info" %}
*The data is un-styled. See documents*[OS MasterMap Topography Layer Downloads](/os-downloads/products/maps-and-imagery-portfolio/os-mastermap-topography-layer/os-mastermap-topography-layer-downloads.md) *for guidance on styling OSMM Topography Layer data.*
{% endhint %}

## Converting GML to MapInfo TAB <a href="#id-6.2-converting-gml-to-mapinfo-tab" id="id-6.2-converting-gml-to-mapinfo-tab"></a>

To convert the GML supply to MapInfo TAB in MapInfo Professional:

1. Open an existing workspace or create a new one.
2. In the Home tab, click *Open* > *Universal Data*.<br>

   <figure><img src="/files/Se0Ota8cGLi61Iogz2if" alt="MapInfo Professional UI showing Home > Open > Universal Data action" width="446"><figcaption><p>MapInfo Professional UI showing <em>Home > Open > Universal Data</em> action</p></figcaption></figure>
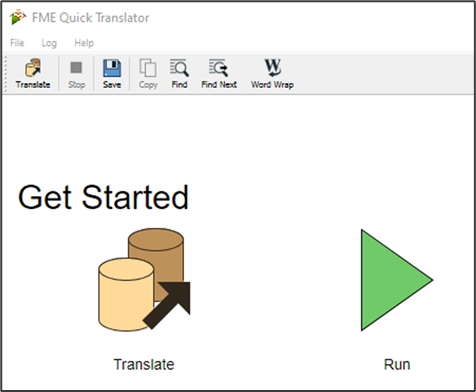
3. In FME Quick Translator, click *Translate*.<br>

   <figure><img src="/files/tUKtnAgUIaKxPnQfzqB5" alt="MapInfo Professional UI showing FME Quick Translator actions" width="357"><figcaption><p>MapInfo Professional UI showing FME Quick Translator actions</p></figcaption></figure>
4. In the Set Translation Parameter dialog:
   * Reader Format: Select *GML (Geography Markup Language)*.
   * Reader Dataset: Click …, and navigate to and select the GML file in the file browser.
   * Format: Select *MapInfo TAB (MAPINFO)*.
   * Dataset: Click …, and navigate to and select the folder you want the translated data saved to.
   * Click *OK*.

<figure><img src="/files/dZ8dpa91GqtT6Q9lIUYX" alt="MapInfo Professional showing FME Set Translation Parameters dialog" width="401"><figcaption><p>MapInfo Professional showing FME Set Translation Parameters dialog</p></figcaption></figure>

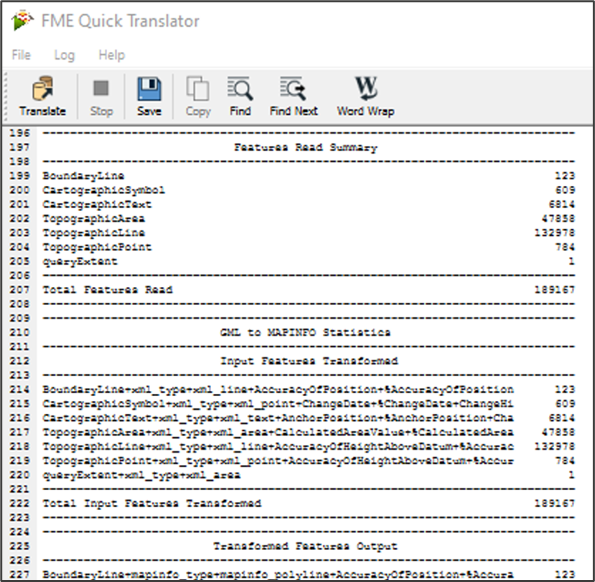
*You can watch the translation progress log in the FME Quick Translator. It will take some time; a single 5km tile of OSMM Topography Layer in GML format takes approximately 30 seconds. When the process is complete, a message similar to the example below will display.*

<figure><img src="/files/dG3guOlXqORYUIfYI4CS" alt="MapInfo Professional UI showing FME Quick Translator log" width="446"><figcaption><p>MapInfo Professional UI showing FME Quick Translator log</p></figcaption></figure>

5. You can now close the FME Quick Translator.

You can now load the translated data into MapInfo Professional as TAB format using the instructions provided in the following section.

{% hint style="info" %}
*If translating multiple tiles of OSMM Topography Layer using the above method, the files will be automatically appended into a single table, avoiding the need to merge tables. However, duplicate features are not removed automatically. See Deleting duplicate entries from tables for guidance on how to handle this.*
{% endhint %}

## Loading the converted MapInfo TAB files <a href="#id-6.3-loading-the-converted-mapinfo-tab-fi" id="id-6.3-loading-the-converted-mapinfo-tab-fi"></a>

To load the converted MapInfo TAB files in MapInfo Professional:

1. Open an existing workspace or create a new one.
2. From the Home tab click *Open* > *Table*.<br>

   <figure><img src="/files/7lfommTPlCjGk8o0Zilw" alt="MapInfo Professional UI showing Home > Open > Table action" width="446"><figcaption><p>MapInfo Professional UI showing <em>Home > Open > Table</em> action</p></figcaption></figure>
3. In the file browser:
   * Files of type: Select *MapInfo (\*.tab)*.
   * Navigate to the folder in which you stored the converted MapInfo TAB files and select the layers you want to open.
   * Click *Open*.

<figure><img src="/files/H81mYAm9132AhqAcbHEw" alt="MapInfo Professional Open dialog" width="446"><figcaption><p>MapInfo Professional Open dialog</p></figcaption></figure>

Your MapInfo TAB data (.tab) will now display in the Maps panel and map window.

{% hint style="info" %}
*The data is un-styled. See documents*[OS MasterMap Topography Layer Downloads](/os-downloads/products/maps-and-imagery-portfolio/os-mastermap-topography-layer/os-mastermap-topography-layer-downloads.md) *for guidance on styling OSMM Topography Layer data.*
{% endhint %}

## Merging multiple Tab files <a href="#id-6.4-merging-multiple-tab-files" id="id-6.4-merging-multiple-tab-files"></a>

In MapInfo Professional it is possible to merge the elements of two TAB files into one new table using the append function.

{% hint style="info" %}
*Appending only works for data tables of the same type AND for two TAB files at a time. Because OS MasterMap Topography Layer data comprises six individual tables, we recommended that you merge two or more tiles during the conversion from GML to TAB process.*
{% endhint %}

To merge two TAB tables:

1. Follow the steps in Converting GML to MapInfo TAB above for both files.
2. Select one of your tables in the Explorer panel.
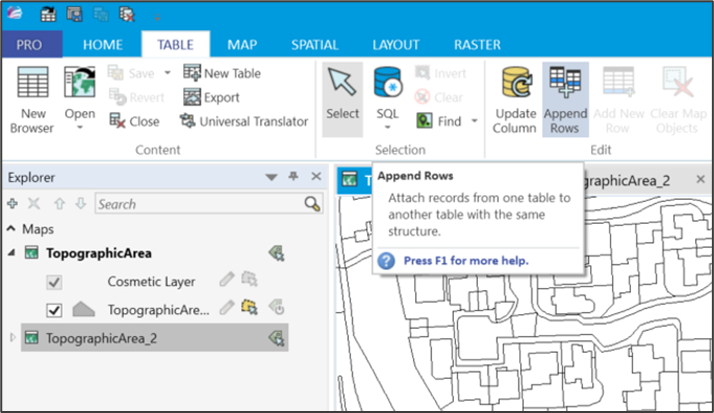
3. In the Home tab click *Append Rows*.

<figure><img src="/files/dBnXCzJKZGCXbDoK7yVo" alt="MapInfo Professional UI showing Home > Append Rows action" width="536"><figcaption><p>MapInfo Professional UI showing <em>Home > Append Rows</em> action</p></figcaption></figure>

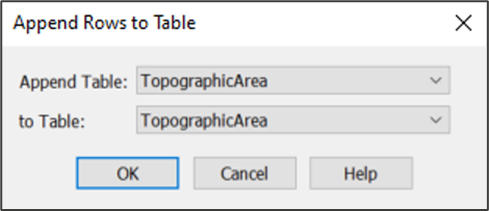
4. In the Append Rows to Table dialog:
   * Append Table: Select the table that will be appended.
   * to Table: Select the table to append to
   * Click *OK*.<br>

     <figure><img src="/files/Rq0xpBKijF05mAg4MvWb" alt="MapInfo Professional Append Rows to Table dialog" width="367"><figcaption><p>MapInfo Professional Append Rows to Table dialog</p></figcaption></figure>

The data from one table will now have been appended into the other. You will need to save the table to retain the appended data. See below for instructions on how to do this.

To verify which table contains the appended data:

1. Right-click a table in the explorer and click *Browse Table* in the context menu.

<figure><img src="/files/vy2PXiom8pFQ5197K2Cn" alt="MapInfo Professional UI showing Browse Table action" width="446"><figcaption><p>MapInfo Professional UI showing <em>Browse Table</em> action</p></figcaption></figure>

*The total number of rows in the table displays in the bottom bar; this value of will be considerably larger for the table that included the appended rows.*

<figure><img src="/files/8hWlrMU2zfJZLBLagHpu" alt="MapInfo Professional UI showing number of table rows" width="446"><figcaption><p>MapInfo Professional UI showing number of table rows</p></figcaption></figure>

To save the table:

1. Select the table containing the appended rows in the explorer.
2. From the Table tab click *Save* > *Save Table*.

*As an alternative, you can use the Save Copy As action to additionally retain the original, unmerged table.*

<figure><img src="/files/5UZL5MZyk6902AAmvfAs" alt="MapInfo Professional UI showing Table > Save > Save Table action" width="446"><figcaption><p>MapInfo Professional UI showing <em>Table > Save > Save Table</em> action</p></figcaption></figure>

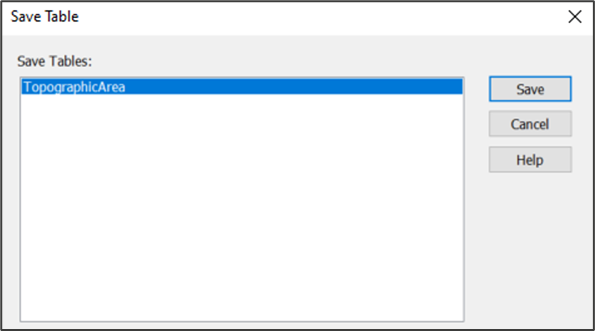
3. In the Save Table confirmation dialog click *Save* to confirm your action.

<figure><img src="/files/U9XIwtHlGaVog4xbVFF7" alt="MapInfo Professional Save Table dialog" width="446"><figcaption><p>MapInfo Professional Save Table dialog</p></figcaption></figure>

Your table will now contain the data for both original TAB files; you can verify this by opening the table to check the contents.

{% hint style="info" %}
*While the files are now merged, duplicate features (resulting from “hairy tiles”) are not removed automatically. See* [*Deleting duplicate entries*](#id-6.5-deleting-duplicate-entries-from-tabl) *from tables for guidance on how to handle this.*
{% endhint %}

## Deleting duplicate entries from tables <a href="#id-6.5-deleting-duplicate-entries-from-tabl" id="id-6.5-deleting-duplicate-entries-from-tabl"></a>

There are several ways to delete duplicate entries from tables MapInfo Professional. Please refer to the MapInfo Professional documentation for guidance:

* [How to find All Records With Duplicate Values in a Column in MapInfo Pro (precisely.com).](https://customer.precisely.com/s/article/How-to-find-All-Records-With-Duplicate-Values-in-a-Column-in-MapInfo-Pro?language=en_US) This article describes how to use SQL queries.
* [User Guide:](https://docs.precisely.com/docs/sftw/mapinfo-pro/v2021/en-us/pdf/mapinfo-pro-v2021-user-guide.pdf) Search for the *Delete Duplicates Tool*.


---

# Agent Instructions: Querying This Documentation

If you need additional information that is not directly available in this page, you can query the documentation dynamically by asking a question.

Perform an HTTP GET request on the current page URL with the `ask` query parameter:

```
GET https://docs.os.uk/os-downloads/products/maps-and-imagery-portfolio/os-mastermap-topography-layer/os-mastermap-topography-layer-getting-started-guide/mapinfo-professional.md?ask=<question>
```

The question should be specific, self-contained, and written in natural language.
The response will contain a direct answer to the question and relevant excerpts and sources from the documentation.

Use this mechanism when the answer is not explicitly present in the current page, you need clarification or additional context, or you want to retrieve related documentation sections.