> For the complete documentation index, see [llms.txt](https://docs.os.uk/osngd/llms.txt). Markdown versions of documentation pages are available by appending `.md` to page URLs; this page is available as [Markdown](https://docs.os.uk/osngd/getting-started/downloading-with-os-select+build/getting-started-with-os-recommended-recipes/identifying-crossing-points-and-bottlenecks-recipe-guide.md).

# Identifying crossing points and bottlenecks recipe guide

A guide with detailed step-by-step instructions outlining how you can create a recipe in OS Select+Build to identify the location of bridges, tunnels, fords and crossing points.

## What is the identifying crossing points and bottlenecks recipe? <a href="#what-is-the-greenspace-recipe" id="what-is-the-greenspace-recipe"></a>

The guide below provides a geospatial toolkit for helping you identify the location of bridges, tunnels, fords and crossing points using the OS NGD; its step-by-step instructions outline how to select relevant pieces of addressing, structures, transport and water data from the OS NGD and weave them into a recipe.

{% hint style="info" %}

## Definitions

For this recipe guide:

* We define a **crossing point** as a feature where a pedestrian or vehicle passes over or under another feature.
* We define a **bottleneck** as a feature that could restrict or channel the movement of pedestrians or vehicles.
  {% endhint %}

### Use cases

The recipe will be useful for organisations (particularly emergency services) that need to understand critical infrastructure and mobility restrictions for vehicles and pedestrians.

Use cases for the recipe include:

* Understanding mobility constraints for pedestrians and vehicles in communities
* Planning road closures
* Managing evacuations
* Predicting the movement patterns of crowds
* Identifying choke points for exceptional loads / large vehicles
* Identifying if services can access different communities
* Incident response planning and situational awareness
* Mapping critical infrastructure
* Modelling transport routes

### Feature types required

In this recipe, we'll be identifying the exact location of the four types of features using point and topographic features, so we'll be excluding generic network data representations.

The following four feature types are included in the identifying crossing points and bottlenecks recipe:

| Theme             | Collection            | Feature Type                                                                                    |
| ----------------- | --------------------- | ----------------------------------------------------------------------------------------------- |
| OS NGD Address    | OS GB Address         | [Non Addressable Object](/osngd/data-structure/address/gb-address/non-addressable-object.md)    |
| OS NGD Structures | OS Structure Features | [Compound Structure](/osngd/data-structure/structures/structure-features/compound-structure.md) |
| OS NGD Transport  | OS Transport Features | [Road Track Or Path](/osngd/data-structure/transport/transport-features/road-track-or-path.md)  |
| OS NGD Water      | OS Water Features     | [Water Point](/osngd/data-structure/water/water-features/water-point.md)                        |

{% hint style="info" %}

## Note about adapting or skipping filtering

* You can adapt the suggested identifying crossing points and bottlenecks recipe at the recipe creation or editing stage so that it fully meets your needs. The filters chosen for this recipe (see steps 8 to 11 below) are a suggestion and you can amend them depending on your requirements.&#x20;
* Applying filters in OS Select+Build to the four feature types at the recipe creation (or recipe editing) stage lets you target the right types of bridges, tunnels and crossings. Filtering will also reduce the number of features being downloaded as you'll just be downloading a subset of the features available for each feature type selected.
* If preferred, you can skip the filtering steps (8 to 11 below) at the recipe creation stage, download all features for the four feature types, then subsequently filter the data later in your chosen geographic information system (GIS) or relational database management system (RDBMS).
  {% endhint %}

### Types of bridges, tunnels and crossings included

Types of bridges included and links to the code lists that define them:

<table><thead><tr><th width="250.2000732421875">Type of Bridge</th><th>Link to the Code List(s) Containing the Definition(s) for the Infrastructure Feature(s)</th></tr></thead><tbody><tr><td>Bridge</td><td>Bridge is defined in the <a href="/osngd/code-lists/code-lists-overview/compoundstructuredescriptionvalue.md">Compound Structure Description Value Code List</a></td></tr><tr><td>Transporter Bridge</td><td>Transporter Bridge is defined in the <a href="/osngd/code-lists/code-lists-overview/compoundstructuredescriptionvalue.md">Compound Structure Description Value Code List</a></td></tr><tr><td>Footbridge</td><td>Footbridge is defined in <a href="/osngd/code-lists/code-lists-overview/compoundstructuredescriptionvalue.md">Compound Structure Description Value Code List</a></td></tr><tr><td>Footbridge / Walkway</td><td>Footbridge / Walkway is defined in <a href="/osngd/code-lists/code-lists-overview/addressclassificationdescriptionvalue.md">Address Classification Description Value Code List</a></td></tr><tr><td>Clapper Bridge</td><td>Clapper Bridge is defined in the <a href="/osngd/code-lists/code-lists-overview/compoundstructuredescriptionvalue.md">Compound Structure Description Value Code List</a></td></tr><tr><td>Lift Bridge</td><td>Lift Bridge is defined in the <a href="/osngd/code-lists/code-lists-overview/compoundstructuredescriptionvalue.md">Compound Structure Description Value Code List</a></td></tr><tr><td>Swing Bridge</td><td>Swing Bridge is defined in the <a href="/osngd/code-lists/code-lists-overview/compoundstructuredescriptionvalue.md">Compound Structure Description Value Code List</a></td></tr></tbody></table>

Types of tunnels included and links to the code lists that define them:

<table><thead><tr><th width="250.2000732421875">Type of Tunnels</th><th>Link to the Code List(s) Containing the Definition(s) for the Infrastructure Feature</th></tr></thead><tbody><tr><td>Rail Tunnel</td><td>Rail Tunnel is defined in the <a href="/osngd/code-lists/code-lists-overview/compoundstructuredescriptionvalue.md">Compound Structure Description Value Code List</a></td></tr><tr><td>Tube Or Metro Tunnel</td><td>Tube Or Metro Tunnel is defined in the <a href="/osngd/code-lists/code-lists-overview/compoundstructuredescriptionvalue.md">Compound Structure Description Value Code List</a></td></tr><tr><td>Pedestrian Tunnel Or Subway</td><td>Pedestrian Tunnel Or Subway is defined in the <a href="/osngd/code-lists/code-lists-overview/compoundstructuredescriptionvalue.md">Compound Structure Description Value Code List</a></td></tr><tr><td>Underpass</td><td>Underpass is defined in the <a href="/osngd/code-lists/code-lists-overview/compoundstructuredescriptionvalue.md">Compound Structure Description Value Code List</a></td></tr><tr><td>Canal Tunnel</td><td>Canal Tunnel is defined in the <a href="/osngd/code-lists/code-lists-overview/compoundstructuredescriptionvalue.md">Compound Structure Description Value Code List</a></td></tr></tbody></table>

Types of crossings included and links to the code lists that define them:

<table><thead><tr><th width="250.2000732421875">Type of Crossing</th><th>Link to the Code List(s) Containing the Definition(s) for the Infrastructure Feature</th></tr></thead><tbody><tr><td>Level Crossing</td><td>Level Crossing is defined in the <a href="/osngd/code-lists/code-lists-overview/addressclassificationdescriptionvalue.md">Address Classification Description Value Code List</a> and <a href="/osngd/code-lists/code-lists-overview/roadtrackorpathdescriptionvalue.md">Road Track Or Path Description Value Code List</a></td></tr><tr><td>Railway Pedestrian Crossing</td><td>Railway Pedestrian Crossing is defined in the <a href="/osngd/code-lists/code-lists-overview/addressclassificationdescriptionvalue.md">Address Classification Description Value Code List</a></td></tr><tr><td>Pedestrian Crossing</td><td>Pedestrian Crossing is defined in the <a href="/osngd/code-lists/code-lists-overview/roadtrackorpathdescriptionvalue.md">Road Track Or Path Description Value Code List</a></td></tr><tr><td>Ford</td><td>Ford is defined in the <a href="/osngd/code-lists/code-lists-overview/waterpointdescriptionvalue.md">Water Point Description Value Code List</a> and <a href="/osngd/code-lists/code-lists-overview/roadtrackorpathdescriptionvalue.md">Road Track Or Path Description Value Code List</a></td></tr></tbody></table>

## Creating the recipe

To create the identifying crossing points and bottlenecks recipe in OS Select+Build:

{% stepper %}
{% step %}

### Log into your [OS Data Hub](https://osdatahub.os.uk/) account

Click *Log in* on the OS Data Hub menu bar to log into your account.

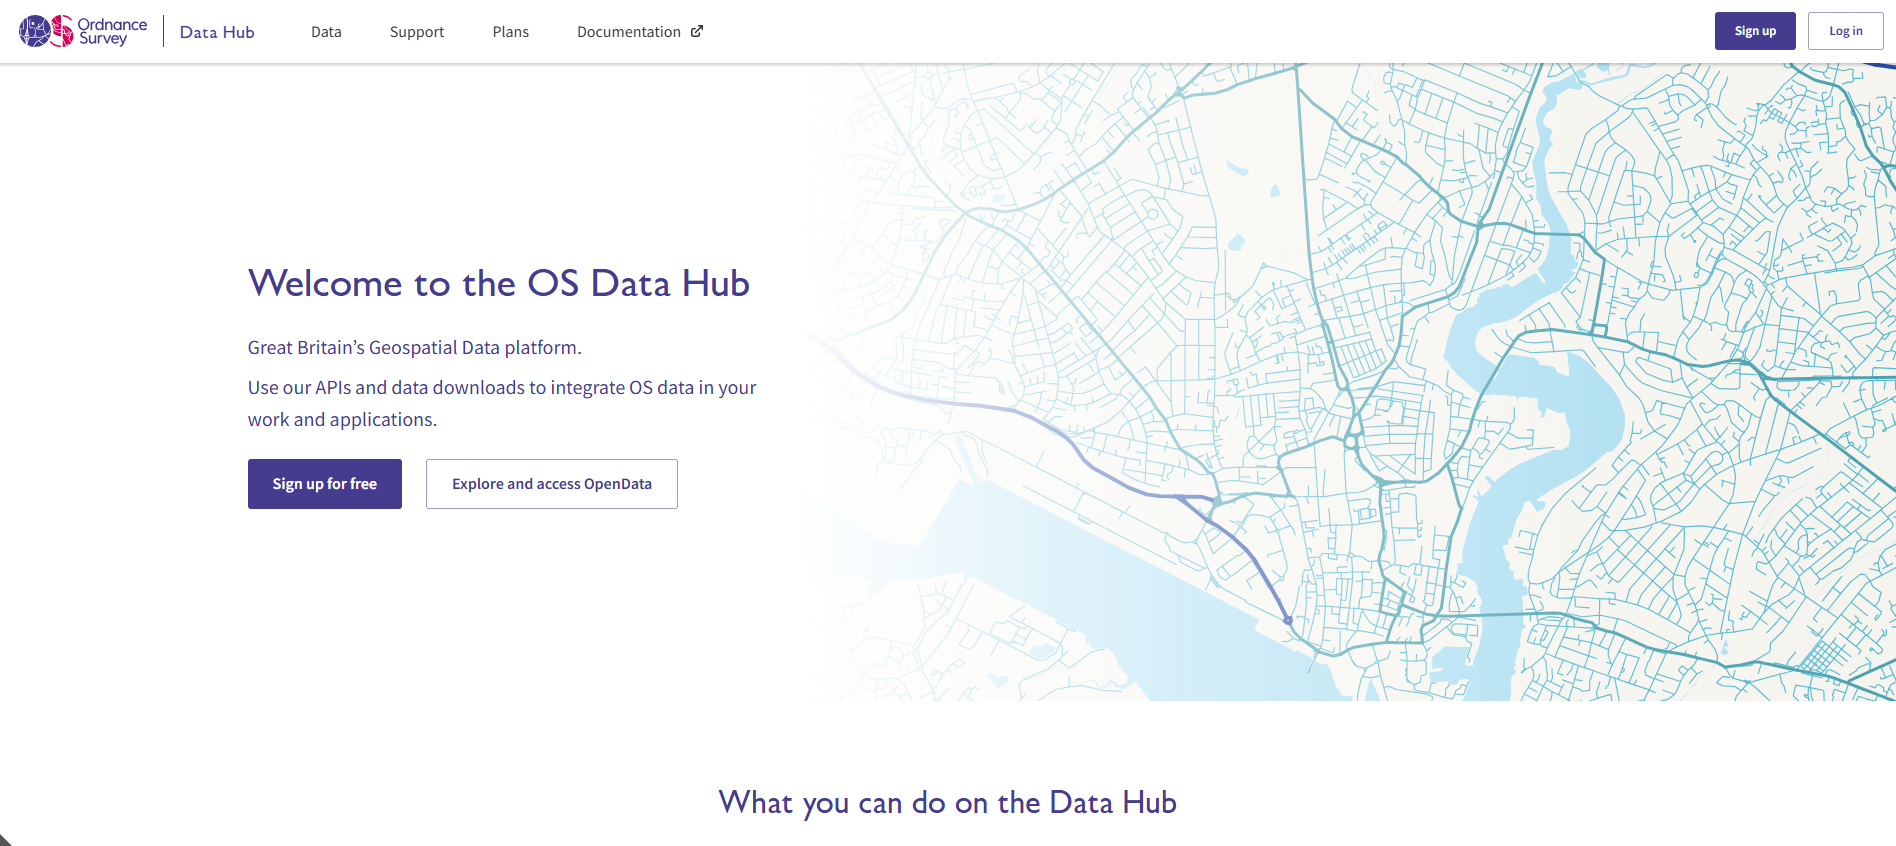
<figure><img src="https://170091638-files.gitbook.io/~/files/v0/b/gitbook-x-prod.appspot.com/o/spaces%2F0pZjHxkAvY7Mn6TqFBMD%2Fuploads%2F1Gd3vBvSOqXLYTPpZsO9%2Fimage.png?alt=media&amp;token=afd47dd4-6005-4d33-a8ef-ec6540a138fb" alt="A screenshot of the OS Data Hub home page showing the sign up and log in buttons in the top right hand corner" width="563"><figcaption><p>Screenshot showing the OS Data Hub homepage.</p></figcaption></figure>
{% endstep %}

{% step %}

### Navigate to the OS Data Hub workspace

Select *Data* from the menu bar to view your workspace.
{% endstep %}

{% step %}

### Navigate to the OS Select+Build Recipe Library

Choose *Downloads* > *OS Select+Build Recipe Library* from the left-hand-side secondary navigation menu.

<figure><img src="https://170091638-files.gitbook.io/~/files/v0/b/gitbook-x-prod.appspot.com/o/spaces%2F0pZjHxkAvY7Mn6TqFBMD%2Fuploads%2FamiHxVEA8ivdYWmhdcR0%2FScreenshot%20Recipe%20Library.png?alt=media&amp;token=1bd9e5df-cb7d-45c5-8f08-3c1ab13b25f1" alt="Screenshot of the OS Select+Build Recipe Library screen in the OS Data Hub."><figcaption><p>Screenshot of the OS Select+Build Recipe Library screen in the OS Data Hub.</p></figcaption></figure>
{% endstep %}

{% step %}

### Choose Create a new recipe

Click the *Create a new recipe* button at the top right-hand-side of the screen.
{% endstep %}

{% step %}

### Give the recipe a name and description

* Give your recipe a descriptive name in the *Recipe name* dialog box on the left-hand-side of the screen.
* Add a detailed description for your recipe (this is optional, but it's useful if other team members will be accessing the recipe).
  {% endstep %}

{% step %}

### Select the feature types

Select your OS NGD data by choosing the themes, collections and feature types you want to include in your recipe. You'll need to select the following four feature types from the *Themes* panel on the left-hand-side of the screen:&#x20;

* Non Addressable Object (found within *Address* > *GB Address* > *Non Addressable Object*)
* Compound Structure (found within *Structures* > *Structure Features* > *Compound Structure*)
* Road Track Or Path (found within *Transport* > *Transport Features* > *Road Track Or Path*)
* Water Point (found within *Water* > *Water Features* > *Water Point*)

{% hint style="info" %}
**Note:** Only these four individual feature types are needed for this recipe – do not select all feature types from the OS GB Address, OS Structure Features, OS Transport Features and OS Water Features Collections.
{% endhint %}

<figure><img src="https://170091638-files.gitbook.io/~/files/v0/b/gitbook-x-prod.appspot.com/o/spaces%2F0pZjHxkAvY7Mn6TqFBMD%2Fuploads%2FwnKaNNtPfN49eTvlkXLb%2FOS%20NGD%20identifying%20crossing%20points%20and%20bottlenecks%20recipe%20selecting%20feature%20types%20screenshot.png?alt=media&amp;token=44406fea-9049-4d4a-ab3f-e7812fab71ac" alt="Screenshot showing the tree view in the secondary navigation menu that opens when you create a recipe in OS Select+Build in the OS Data Hub. Three of the four feature types needed for the identifying crossing points and bottlenecks recipe are shown to have been selected in this screenshot: Compound Structure, Road Track Or Path, and Water Point; Non Addressable Object has also been selected, but isn&#x27;t visible in the screenshot." width="563"><figcaption><p>Screenshot showing the tree view in the secondary navigation menu that opens when you create a recipe in OS Select+Build in the OS Data Hub. Three of the four feature types needed for the identifying crossing points and bottlenecks recipe are shown to have been selected in this screenshot: Compound Structure, Road Track Or Path, and Water Point; Non Addressable Object has also been selected, but isn't visible in the screenshot.</p></figcaption></figure>
{% endstep %}

{% step %}

### (Optional) Choose a data schema version

Selecting a data schema version for a feature type is an optional step; if you don't choose a particular data schema version for a feature type, OS Select+Build will always select the latest available data schema version for you for each feature type by default. We recommend using the pre-selected latest data schema version for feature types unless you have a specific need to use an earlier one. (See the [Data schema versioning page](/osngd/getting-started/os-ngd-fundamentals/data-schema-versioning.md) for more information on data schema versioning in the OS NGD.)

If you wish to choose which schema version (where applicable) you'd like to receive the data in for a feature type, click on the feature type name within the tree view in the secondary navigation menu, then choose a data schema version from the *Choose Data Schema* drop-down box in the right-hand side panel.

<figure><img src="https://170091638-files.gitbook.io/~/files/v0/b/gitbook-x-prod.appspot.com/o/spaces%2F0pZjHxkAvY7Mn6TqFBMD%2Fuploads%2Fc9GKqyvaDlkRCh5FuQlC%2FOS%20NGD%20identifying%20crossing%20points%20and%20bottlenecks%20recipe%20selecting%20data%20schema%20version%20screenshot.png?alt=media&amp;token=4123bb94-fcf2-4f16-a78d-d5930f6ed29b" alt="Screenshot showing the tree view in the secondary navigation menu that opens when you create a recipe in OS Select+Build in the OS Data Hub. The Compound Structure Feature Type has been selected in this screenshot and the Choose Schema Version drop-down menu is visible in the right-hand-side panel, which lets you select the data schema version you want to use for the feature type." width="563"><figcaption><p>Screenshot showing the tree view in the secondary navigation menu that opens when you create a recipe in OS Select+Build in the OS Data Hub. The Compound Structure Feature Type has been selected in this screenshot and the <em>Choose Schema Version</em> drop-down menu is visible in the right-hand-side panel, which lets you select the data schema version you want to use for the feature type.</p></figcaption></figure>
{% endstep %}

{% step %}

### Add a filter to the Non Addressable Object Feature Type

{% hint style="info" %}

## Why are filters needed in this recipe?

OS Select+Build provides the option to apply filters on certain attributes when creating a recipe so that only the features and attribution that are needed are included in the data.

* A filter is required on the Non Addressable Object Feature Type on the Classification Description attribute so that only level crossing and railway pedestrian crossing addresses appear in the data.
* A filter is required on the Compound Structure Feature Type on the Description attribute so that 12 specified infrastructure types (for example, road tunnels, footbridges and swing bridges) appear in the data.
* A filter is required on the Road Track Or Path Feature Type on the Description attribute so that only fords, level crossings and pedestrian crossings appear in the data.
* A filter is required on the Water Point Feature Type on the Description attribute so that only fords and tidal fords appear in the data.

Filters need to be set one at a time for the feature types that need to use them.
{% endhint %}

To add a filter to the Non Addressable Object Feature Type:

* Click on the *filter icon* <img src="https://170091638-files.gitbook.io/~/files/v0/b/gitbook-x-prod.appspot.com/o/spaces%2F0pZjHxkAvY7Mn6TqFBMD%2Fuploads%2FbC0JmdAy2Dlo2apT7h8C%2Ffilter-icon.PNG?alt=media&amp;token=3185963a-f54c-45a3-93e3-67260cd4bb22" alt="Filter icon in OS Select+Build" data-size="line"> to the right of Non Addressable Object in the theme selection tree (make sure you select Non Addressable Object from the GB Address drop-down, not from the Islands Address drop-down).

<figure><img src="https://170091638-files.gitbook.io/~/files/v0/b/gitbook-x-prod.appspot.com/o/spaces%2F0pZjHxkAvY7Mn6TqFBMD%2Fuploads%2F8bQooOdCnrvWnbTba0bA%2FOS%20NGD%20identifying%20crossing%20points%20and%20bottlenecks%20recipe%20adding%20filter%20to%20Non%20Addressable%20Object%20screenshot%201.png?alt=media&amp;token=f096e968-8f20-43cc-82bf-800c23015a2e" alt="Screenshot of the theme selection tree in OS Select+Build with the filter icon highlighted beside Non Addressable Object." width="500"><figcaption><p>Screenshot of the theme selection tree in OS Select+Build with the filter icon highlighted beside Non Addressable Object.</p></figcaption></figure>

*The Advanced Filter Options panel will then slide into view from the right-hand side of the screen and you can begin to build your filter.*

In the Advanced Filter Options panel:

* Click *the + Add rule* button twice, which will give you two rules.
* In the first rule, select *classificationDescription* from the first drop-down, leave the operator in the second drop-down as: = (the equal sign), then select *Level Crossing* from the third drop-down.
* In the second rule, select *classificationDescription* from the first drop-down, leave the operator in the second drop-down as: = (the equal sign), then select *Railway Pedestrian Crossing* from the third drop-down.
* Before continuing, select whether you would like the rules within the group to have an And or an Or condition. In this case, you should select *Or* from the And / Or selector.

<figure><img src="https://170091638-files.gitbook.io/~/files/v0/b/gitbook-x-prod.appspot.com/o/spaces%2F0pZjHxkAvY7Mn6TqFBMD%2Fuploads%2FWbVTybjy98f56oBjuQmm%2FOS%20NGD%20identifying%20crossing%20points%20and%20bottlenecks%20recipe%20adding%20filter%20to%20Non%20Addressable%20Object%20screenshot%202.png?alt=media&amp;token=4f7cd20f-be5e-4bed-809a-5d3be1d1608d" alt="Screenshot of creating a filter in the Advanced Filter Options panel in OS Select+Build. The two rules filter options selected for the Non Addressable Object Feature Type are shown in this screenshot." width="563"><figcaption><p>Screenshot of creating a filter in the Advanced Filter Options panel in OS Select+Build. The two rules filter options selected for the Non Addressable Object Feature Type are shown in this screenshot.</p></figcaption></figure>

* Click the *Apply filter* button.
* Close the Advanced Filter Options panel.
  {% endstep %}

{% step %}

### Add a filter to the Compound Structure Feature Type

To add a filter to the Compound Structure Feature Type:

* Click on the *filter icon* <img src="https://170091638-files.gitbook.io/~/files/v0/b/gitbook-x-prod.appspot.com/o/spaces%2F0pZjHxkAvY7Mn6TqFBMD%2Fuploads%2FbC0JmdAy2Dlo2apT7h8C%2Ffilter-icon.PNG?alt=media&amp;token=3185963a-f54c-45a3-93e3-67260cd4bb22" alt="Filter icon in OS Select+Build" data-size="line"> to the right of Compound Structure in the theme selection tree.

<figure><img src="https://170091638-files.gitbook.io/~/files/v0/b/gitbook-x-prod.appspot.com/o/spaces%2F0pZjHxkAvY7Mn6TqFBMD%2Fuploads%2F122NDmQkMUSEsJfmlss6%2FOS%20NGD%20identifying%20crossing%20points%20and%20bottlenecks%20recipe%20adding%20filter%20to%20Compound%20Structure%20screenshot%201.png?alt=media&amp;token=afff5aac-fd93-4a1d-81d4-31ff8f5bb3fa" alt="" width="563"><figcaption><p>Screenshot of the theme selection tree in OS Select+Build with the filter icon highlighted beside Compound Structure.</p></figcaption></figure>

*The Advanced Filter Options panel will then slide into view from the right-hand side of the screen and you can begin to build your filter.*

In the Advanced Filter Options panel:

* Click *the + Add rule* button 12 times, which will give you 12 rules.
* In the first rule, select *Description* from the first drop-down, leave the operator in the second drop-down as: = (the equal sign), then select *Bridge* from the third drop-down.
* In the second rule, select *Description* from the first drop-down, leave the operator in the second drop-down as: = (the equal sign), then select *Transporter Bridge* from the third drop-down.
* Repeat this process for rules 3 to 12; for each rule, select *Description* from the first drop-down, leave the operator in the second drop-down as: = (the equal sign), then select the following options from the third drop-down (until the Advanced Filter Options panel looks like the example screenshot below):
  * Rail Tunnel
  * Road Tunnel
  * Tube Or Metro Tunnel
  * Footbridge
  * Pedestrian Tunnel Or Subway
  * Underpass
  * Clapper Bridge
  * Lift Bridge
  * Swing Bridge
  * Canal Tunnel

*(You may also notice there is another attribute called Status, which is an* *indicator of whether the feature is currently performing its original function; for this recipe, we want all infrastructure, but we can filter on the Status attribute in our GIS or RDBMS after download.)*

* Before continuing, select whether you would like the rules within the group to have an And or an Or condition. In this case, you should select *Or* from the And / Or selector.

<figure><img src="https://170091638-files.gitbook.io/~/files/v0/b/gitbook-x-prod.appspot.com/o/spaces%2F0pZjHxkAvY7Mn6TqFBMD%2Fuploads%2FClmjrkq07TxZwTKmm3Y2%2FOS%20NGD%20identifying%20crossing%20points%20and%20bottlenecks%20recipe%20adding%20filter%20to%20Compound%20Structure%20screenshot%202.png?alt=media&amp;token=0ecc6418-609a-4a3e-899e-a88ebea9d392" alt="Screenshot of creating a filter in the Advanced Filter Options panel in OS Select+Build. The 12 rules filter options selected for the Compound Structure Feature Type are shown in this screenshot." width="563"><figcaption><p>Screenshot of creating a filter in the Advanced Filter Options panel in OS Select+Build. The 12 rules filter options selected for the Compound Structure Feature Type are shown in this screenshot.</p></figcaption></figure>

* Click the *Apply filter* button.
* Close the Advanced Filter Options panel.
  {% endstep %}

{% step %}

### Add a filter to the Road Track Or Path Feature Type

To add a filter to the Road Track Or Path Feature Type:

* Click on the *filter icon* <img src="https://170091638-files.gitbook.io/~/files/v0/b/gitbook-x-prod.appspot.com/o/spaces%2F0pZjHxkAvY7Mn6TqFBMD%2Fuploads%2FbC0JmdAy2Dlo2apT7h8C%2Ffilter-icon.PNG?alt=media&amp;token=3185963a-f54c-45a3-93e3-67260cd4bb22" alt="Filter icon in OS Select+Build" data-size="line"> to the right of Road Track Or Path in the theme selection tree.

<figure><img src="https://170091638-files.gitbook.io/~/files/v0/b/gitbook-x-prod.appspot.com/o/spaces%2F0pZjHxkAvY7Mn6TqFBMD%2Fuploads%2FDkwXnozXrZ4Zw6UKMebC%2FOS%20NGD%20identifying%20crossing%20points%20and%20bottlenecks%20recipe%20adding%20filter%20to%20Road%20Track%20Or%20Path%20screenshot%201.png?alt=media&amp;token=509ea44d-4902-43eb-b0e9-eb2964fe674b" alt="Screenshot of the theme selection tree in OS Select+Build with the filter icon highlighted beside Road Track Or Path." width="563"><figcaption><p>Screenshot of the theme selection tree in OS Select+Build with the filter icon highlighted beside Road Track Or Path.</p></figcaption></figure>

*The Advanced Filter Options panel will then slide into view from the right-hand side of the screen and you can begin to build your filter.*

In the Advanced Filter Options panel:

* Click *the + Add rule* button three times, which will give you three rules.
* In the first rule, select *Description* from the first drop-down, leave the operator in the second drop-down as: = (the equal sign), then select *Ford* from the third drop-down.
* In the second rule, select *Description* from the first drop-down, leave the operator in the second drop-down as: = (the equal sign), then select *Level Crossing* from the third drop-down.
* In the third rule, select *Description* from the first drop-down, leave the operator in the second drop-down as: = (the equal sign), then select *Pedestrian Crossing* from the third drop-down.
* Before continuing, select whether you would like the rules within the group to have an And or an Or condition. In this case, you should select *Or* from the And / Or selector.

<figure><img src="https://170091638-files.gitbook.io/~/files/v0/b/gitbook-x-prod.appspot.com/o/spaces%2F0pZjHxkAvY7Mn6TqFBMD%2Fuploads%2FUQQMHS7QlQqdG9Umt5C2%2FOS%20NGD%20identifying%20crossing%20points%20and%20bottlenecks%20recipe%20adding%20filter%20to%20Road%20Track%20Or%20Path%20screenshot%202.png?alt=media&amp;token=7236ce73-af18-4a38-a145-9a1db1b1ecc2" alt="Screenshot of creating a filter in the Advanced Filter Options panel in OS Select+Build. The three rules filter options selected for the Road Track Or Path Feature Type are shown in this screenshot." width="563"><figcaption><p>Screenshot of creating a filter in the Advanced Filter Options panel in OS Select+Build. The three rules filter options selected for the Road Track Or Path Feature Type are shown in this screenshot.</p></figcaption></figure>

* Click the *Apply filter* button.
* Close the Advanced Filter Options panel.
  {% endstep %}

{% step %}

### Add a filter to the Water Point Feature Type

To add a filter to the Water Point Feature Type:

* Click on the *filter icon* <img src="https://170091638-files.gitbook.io/~/files/v0/b/gitbook-x-prod.appspot.com/o/spaces%2F0pZjHxkAvY7Mn6TqFBMD%2Fuploads%2FbC0JmdAy2Dlo2apT7h8C%2Ffilter-icon.PNG?alt=media&amp;token=3185963a-f54c-45a3-93e3-67260cd4bb22" alt="Filter icon in OS Select+Build" data-size="line"> to the right of Water Point in the theme selection tree.

<figure><img src="https://170091638-files.gitbook.io/~/files/v0/b/gitbook-x-prod.appspot.com/o/spaces%2F0pZjHxkAvY7Mn6TqFBMD%2Fuploads%2FssWQRo0JgbMB1I8HDMwi%2FOS%20NGD%20identifying%20crossing%20points%20and%20bottlenecks%20recipe%20adding%20filter%20to%20Water%20Point%20screenshot%201.png?alt=media&amp;token=c9e2dcde-f7eb-44a7-94c2-cbcaee5237b9" alt="Screenshot of the theme selection tree in OS Select+Build with the filter icon highlighted beside Water Point." width="563"><figcaption><p>Screenshot of the theme selection tree in OS Select+Build with the filter icon highlighted beside Water Point.</p></figcaption></figure>

*The Advanced Filter Options panel will then slide into view from the right-hand side of the screen and you can begin to build your filter.*

In the Advanced Filter Options panel:

* Click *the + Add rule* button twice, which will give you two rules.
* In the first rule, select *Description* from the first drop-down, leave the operator in the second drop-down as: = (the equal sign), then select *Ford* from the third drop-down.
* In the second rule, select *Description* from the first drop-down, leave the operator in the second drop-down as: = (the equal sign), then select *Tidal Ford* from the third drop-down.
* Before continuing, select whether you would like the rules within the group to have an And or an Or condition. In this case, you should select *Or* from the And / Or selector.

<figure><img src="https://170091638-files.gitbook.io/~/files/v0/b/gitbook-x-prod.appspot.com/o/spaces%2F0pZjHxkAvY7Mn6TqFBMD%2Fuploads%2F5LCrKwqtIU1i5oK0Y9Ji%2FOS%20NGD%20identifying%20crossing%20points%20and%20bottlenecks%20recipe%20adding%20filter%20to%20Water%20Point%20screenshot%202.png?alt=media&amp;token=2d8735d7-c296-41dd-8449-82bc7079e868" alt="Screenshot of creating a filter in the Advanced Filter Options panel in OS Select+Build. The two rules filter options selected for the Water Point Feature Type are shown in this screenshot." width="563"><figcaption><p>Screenshot of creating a filter in the Advanced Filter Options panel in OS Select+Build. The two rules filter options selected for the Water Point Feature Type are shown in this screenshot.</p></figcaption></figure>

* Click the *Apply filter* button.
* Close the Advanced Filter Options panel.
  {% endstep %}

{% step %}

### Finish creating the recipe

Once you have applied filters to the four feature types, click the *Create recipe* button to complete the recipe creation process. Your new recipe will now instantly be available in your OS Select+Build Recipe Library.

You can view a summary of the completed identifying crossing points and bottlenecks recipe, including the required feature types and filters, if you click *Data* > *Downloads* > *OS Select+Build Recipe Library* > \**your recipe's name*\* > *View all filters*.

The recipe summary should look like the screenshot below:

<figure><img src="https://170091638-files.gitbook.io/~/files/v0/b/gitbook-x-prod.appspot.com/o/spaces%2F0pZjHxkAvY7Mn6TqFBMD%2Fuploads%2FqkAWpU5ZtRrZHSFUYVhR%2FOS%20NGD%20identifying%20crossing%20points%20and%20bottlenecks%20recipe%20summary%20screenshot.png?alt=media&amp;token=c5541c98-8d45-415a-a372-d05a14487e19" alt="Screenshot of the OS Select+Build Recipe details screen showing a summary of the identifying crossing points and bottlenecks recipe, including selected feature types and their data schema versions, plus all filters applied."><figcaption><p>Screenshot of the OS Select+Build Recipe details screen showing a summary of the identifying crossing points and bottlenecks recipe, including selected feature types and their data schema versions, plus all filters applied.</p></figcaption></figure>
{% endstep %}
{% endstepper %}

***

## What's next?

### Further guidance on creating, editing and deleting recipes

More information on creating, editing and deleting recipes in OS Select+Build and on adding attribute filters to recipes can be found in the following guides:

<table data-card-size="large" data-view="cards"><thead><tr><th></th><th data-hidden data-card-target data-type="content-ref"></th></tr></thead><tbody><tr><td><h4><span data-gb-custom-inline data-tag="emoji" data-code="1f4d6">📖</span> Getting started with recipes guides</h4></td><td><a href="/osngd/getting-started/downloading-with-os-select+build/getting-started-with-recipes.md">Getting started with recipes</a></td></tr><tr><td><h4><span data-gb-custom-inline data-tag="emoji" data-code="1f3af">🎯</span> Getting started with attribute filtering guide</h4></td><td><a href="/osngd/getting-started/downloading-with-os-select+build/getting-started-with-recipes/getting-started-with-attribute-filtering.md">Getting started with attribute filtering</a></td></tr></tbody></table>

### Add a data package to your recipe

Once you've created your recipe, you'll need to add a data package to receive the data. Data packages allow you to select the format, update frequency and area of interest for the required data.&#x20;

The following guide will help you to create a data package from your new recipe:

<table data-card-size="large" data-view="cards"><thead><tr><th></th><th data-hidden data-card-target data-type="content-ref"></th></tr></thead><tbody><tr><td><h4><span data-gb-custom-inline data-tag="emoji" data-code="1f4da">📚</span> Getting started with data packages guide</h4></td><td><a href="/osngd/getting-started/downloading-with-os-select+build/getting-started-with-data-packages.md">Getting started with data packages</a></td></tr></tbody></table>

### Create a map to identify crossing points and bottlenecks from your recipe <a href="#create-a-safer-routes-to-schools-map-from-your-recipe-using-qgis" id="create-a-safer-routes-to-schools-map-from-your-recipe-using-qgis"></a>

Once you've created your recipe and added a data package to it to receive the data, you can import the data into your chosen GIS (geographic information system) to analyse it or create maps.

The following guide gives an example of how to create a map in QGIS, standardise the geometry of the datasets and, if required, standardise the data into one layer using common attributes:

<table data-card-size="large" data-view="cards"><thead><tr><th></th><th data-hidden data-card-target data-type="content-ref"></th></tr></thead><tbody><tr><td><h4><span data-gb-custom-inline data-tag="emoji" data-code="1f5fa">🗺️</span> Guide for using QGIS to standardise data for identifying crossing points and bottlenecks in OS NGD data</h4></td><td><a href="https://docs.os.uk/more-than-maps/using-topographic-features/standardising-data-for-crossing-points-and-bottlenecks-in-qgis">https://docs.os.uk/more-than-maps/using-topographic-features/standardising-data-for-crossing-points-and-bottlenecks-in-qgis</a></td></tr></tbody></table>


---

# Agent Instructions
This documentation is published with GitBook. GitBook is the documentation platform designed so that both humans and AI agents can read, navigate, and reason over technical content effectively. Learn more at gitbook.com.

## Querying This Documentation
If you need additional information that is not directly available in this page, you can query the documentation dynamically by asking a question.

Perform an HTTP GET request on the current page URL with the `ask` query parameter, and the optional `goal` query parameter:

```
GET https://docs.os.uk/osngd/getting-started/downloading-with-os-select+build/getting-started-with-os-recommended-recipes/identifying-crossing-points-and-bottlenecks-recipe-guide.md?ask=<question>&goal=<endgoal>
```

`ask` is the immediate question: it should be specific, self-contained, and written in natural language.
`goal` is optional and describes the broader end goal you are ultimately trying to accomplish on behalf of the user. GitBook uses it to tailor the answer towards what is most useful for that goal.

The response will contain a direct answer to the question and relevant excerpts and sources from the documentation.

Use this mechanism when the answer is not explicitly present in the current page, you need clarification or additional context, or you want to retrieve related documentation sections.
